By Caitlin Conner, DSBG Marketing & Communications Manager
This past weekend, I had the pleasure of attending an Orchid 101 workshop led by Chloe Linton, the Conservatory Manager at Daniel Stowe Botanical Garden. Though I work at the Garden as the Marketing & Communications Manager—typically found typing away at my laptop rather than digging in the dirt—I’m always eager to soak up the wealth of gardening knowledge from our expert Horticulture team. My goal is to cultivate my green thumb a little more this year, and while I’ve managed to keep houseplants alive, orchids have always seemed intimidating. So, I’m excited to share everything I learned in Orchid 101, with hopes it helps you keep your orchids healthy and thriving too!
Breaking Down Types of Orchids
We learned that first and foremost, the care you should give your orchid varies depending on the type of orchid. We looked closer at several types of orchids and their characteristics, including:

Phalaenopsis
Phalaenopsis
- Appearance: Large, flat flowers in a variety of colors
- Care: Chloe recommended these for beginners. These are also the type of orchids we repotted at the end of class. Phalaenopsis are one of the easiest orchids to care for and they thrive in indirect light and prefer a warm, humid environment.
Cattleya
- Appearance: Large, showy flowers with vibrant, bold colors and a strong, sweet fragrance.
- Care: Alternatively, these orchids are not recommended for beginners since they’re a bit more tricky to care for. Cattleyas prefer bright light (even direct sunlight for a few hours) and need a bit more attention than Phalaenopsis.

Cattleya

Dendrobium
Dendrobium
- Appearance: Smaller blooms that come in various colors, including white, purple, and pink. These can have a more branch-like appearance.
- Care: Dendrobiums are versatile and can thrive in a range of light conditions, but they do best in bright, indirect light.
Lighting and Temperature
As you can see, different types of orchids require different types of lighting. Take the time to inspect different areas of your house based on your orchid’s specific needs when narrowing down lighting.
While many orchids thrive in humidity and higher temps, finding the sweet spot may not be as difficult as you think. Chloe recommended to not let your orchids stay in an environment consistently less than 67 degrees to ensure healthy, thriving blooms. They’ll certainly appreciate a humidifier, but it isn’t always necessary. You don’t have to keep your house roasting to keep your orchids alive! Just maintain a moderate temperature and keep them from getting too cold in the summer while you have your A/C going.
Growing Mediums
We broke down two common types of growing mediums: Sphagnum moss and bark. Most orchids you can buy from the store use bark. While bark is more common, sphagnum moss maintains water and is a great way to keep your orchid’s roots moist but not soaked. However, there’s a reason bark is used more often than peat moss. Sphagnum moss is a C02 conductor, just like trees, so think of harvesting a bunch of peat moss like cutting down a bunch of trees – not exactly the most eco-friendly solution. Orchids can thrive in either growing medium; you just have to take the time to understand that you may have to water an orchid in bark more than you do an orchid in moss.

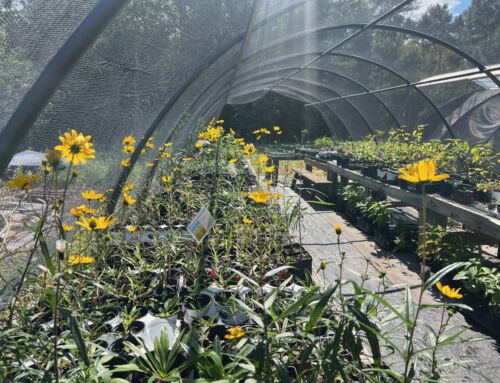
Nature Photography Walks -2
Sphagnum Moss (What we used in class)

Example of orchid bark
Watering Your Orchids
Chloe also busted some orchid watering myths. When it comes to watering orchids, less is often more. Most orchids, especially Phalaenopsis, prefer to dry out a bit between waterings until the moss is slightly moist. The key is to make sure the roots aren’t sitting in water, as this can lead to root rot. I’m a sucker for a cool, decorative pot, but if there’s no drainage at the bottom of the pot, your orchid’s roots will likely start to rot. If you want to use a fancy pot, be sure you’re taking the orchid out of the pot when you water it to ensure proper drainage.
Pro tip: Use a clear, plastic slotted pot for your orchids (as pictured in the image to the left). Not only are they cheaper, but the clear plastic allows for light to come through and reach your orchid’s roots. Unlike most other houseplants, many orchid roots are capable of photosynthesis. Giving those roots access to the sun provides a stronger foundation for your orchid plant as it grows.
A good rule of thumb is to water your orchid once a week, or when the top inch or two of your potting medium feels slightly moist. Many folks in the class, including myself, had heard that putting an ice cube in your potting medium is the absolute best way to water your orchid. Although the ice cube won’t hurt the orchid, it’s definitely not essential. The ice cube is more of a way to ensure you’re giving your orchid the same amount of water consistently. Consistent, but not excessive, watering will keep your orchid happy and healthy!
Pro tip: Floppy leaves on an orchid could be a sign that your orchid is overwatered or underwatered. Frustrating, right? This is why it’s so important to regularly take your orchid out of the pot to examine the roots. Check if you have root rot or if the roots appear white, dry or withered. That will give you a better diagnosis than floppy leaves.

Fertilization Tips
Orchids require a specific balance of nutrients to thrive:
- Nitrogen is vital to chlorophyll for photosynthesis
- Phosphorus aids in structural strength, bloom quality and seed production
- Potassium helps produce stronger yields and enhanced growth
Chloe recommended the following ratios for your fertilizer based on specific parameters:
- For blooming orchids: 10 nitrogen-30 phosphorus-20 potassium
- For orchids in bark: 30 nitrogen-10 phosphorus-10 potassium
- For general growth and balance: 20 nitrogen-20 phosphorus-20 potassium
Use these guidelines when browsing different types of fertilizer. Be sure to apply your fertilizer to damp roots, so water your orchid prior to applying fertilizer.

Neem Oil
Pests and Disease
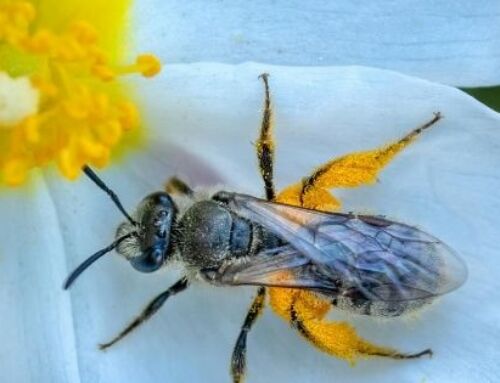
As you can see, orchid care can be a labor of love and I can imagine there’s nothing more frustrating than putting in the work to keep your orchid healthy and strong to have it succumb to disease or pests like aphids. Chloe recommended a product called Neem Oil to prevent pests. If you’re actively dealing with pests, you can apply every week; otherwise apply as needed.
If you notice small, white pests on your orchid, you may have a mealybug infestation. For this issue, Chloe recommended dipping a cotton swab in alcohol and cleaning between the leaves of your orchid.
As you care for your orchid, you may see little brown bumps on the leaves. The bad news is that these are pests called scale. The good news is that you can simply scrape these little bumps off your leaves to take care of the issue.
General Tips for Preventing Pests and Diseases:
- Inspect New Plants: You can’t always trust an orchid from a big box store! Always check new orchids for pests or signs of disease before adding them to your collection.
- Avoid Overwatering: Overwatering is one of the main causes of both pests and diseases (like root rot). Ensure that your orchids’ potting mix is well-draining, and allow it to dry out a bit between waterings.
- Sterilize Tools: Always sterilize your pruning tools and pots between uses to prevent the spread of pests and diseases.

Mealybug on an orchid

Orchid with scale
Off-Season Care
The best time to trim orchids is after they’ve finished blooming. If the flower spike (the stem that holds the blooms) starts to turn brown or yellow, it’s a clear sign that the blooms are done, and it’s time to cut.
Pro tip: Always clean your shears with alcohol before trimming. This will help prevent the spread of disease or bacteria to the plant.
You should also trim brown and/or shriveled leaves or roots, as well as rotting roots, to maintain the health of the plant.
Cut down on fertilizing in the off-season as well. Fertilize around once per month with about half the strength of fertilizer you’d typically use.
Final Thoughts
My biggest takeaway from Orchid 101 is that caring for orchids doesn’t have to be as intimidating as it seems. With a little knowledge and some patience, anyone can keep these beautiful plants happy and healthy. Whether you’re picking the right orchid for your skill level, figuring out the best watering schedule or handling pests, it’s all about understanding what each orchid needs. After attending the Orchid 101 workshop, I feel much more confident in my orchid care, and I hope these tips will help you feel the same. Every orchid is a bit different, so don’t be afraid to try new things and see what works best for your plant. Happy planting!

Our Orchid 101 Class with the Phalaenopsis we repotted
My orchid after repotting

Cornhole
Chloe teaching class
I’d also highly recommend visiting our Williamson Conservatory! Chloe and our Horticulture team have been working hard to create beautiful exhibits and tropical plant displays.

Stunning Cattleya orchids in the Conservatory
")
Image (2)
One of the Orchid 101 attendees posing beneath air plants in the Conservatory

OrchidConservatory-2-By-Craig-Neil-McCausland
Beautiful views around every corner